
Lycoming O-360 Overhaul Manual: A Comprehensive Plan
This manual details the complete overhaul of Lycoming O-360 engines, offering a 114-page illustrated guide (Part 60298-3) in PDF format.
It covers disassembly, inspection, parts replacement (over 100 parts listed), assembly, testing, and break-in procedures, alongside specific series considerations.
Downloadable resources include manuals for O-360, O-540, and O-290-D2 engines, plus Textron Lycoming’s labor allowance guidebook for accurate estimations.
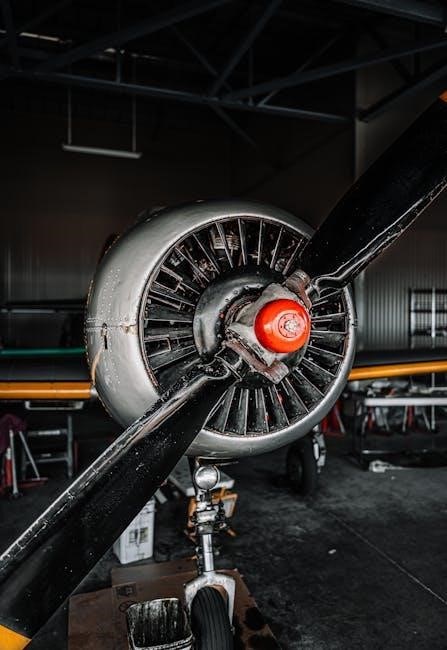
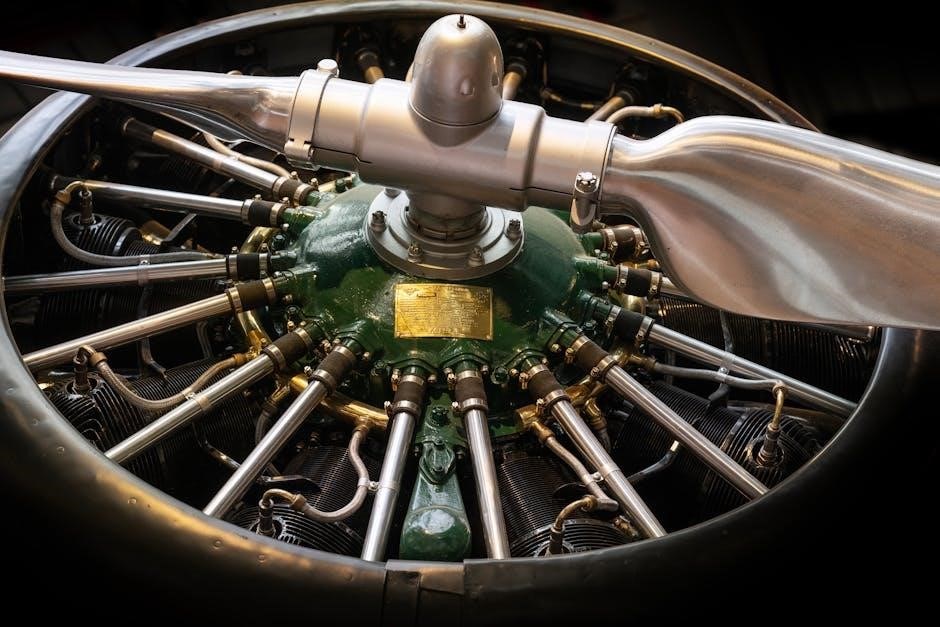
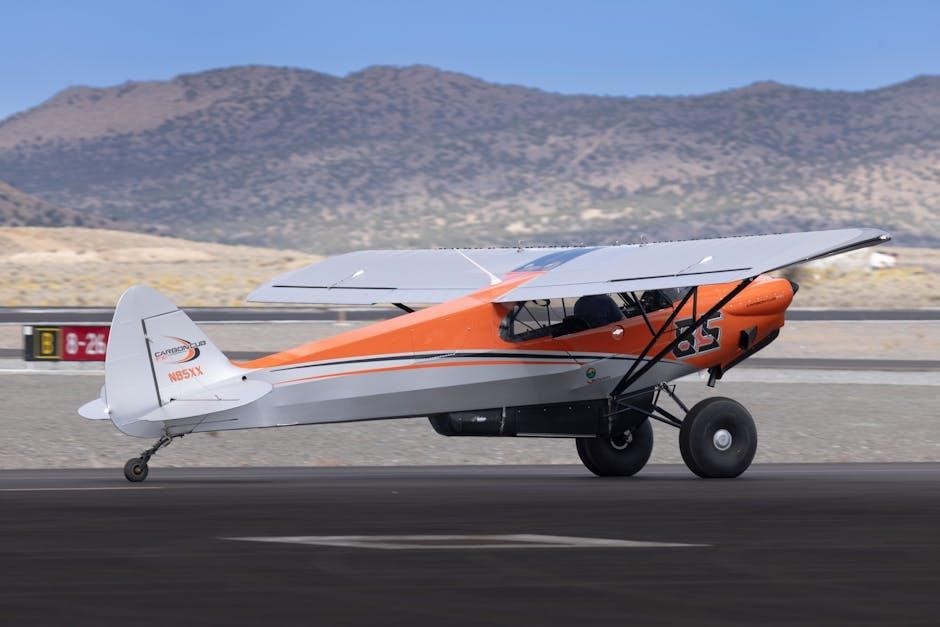
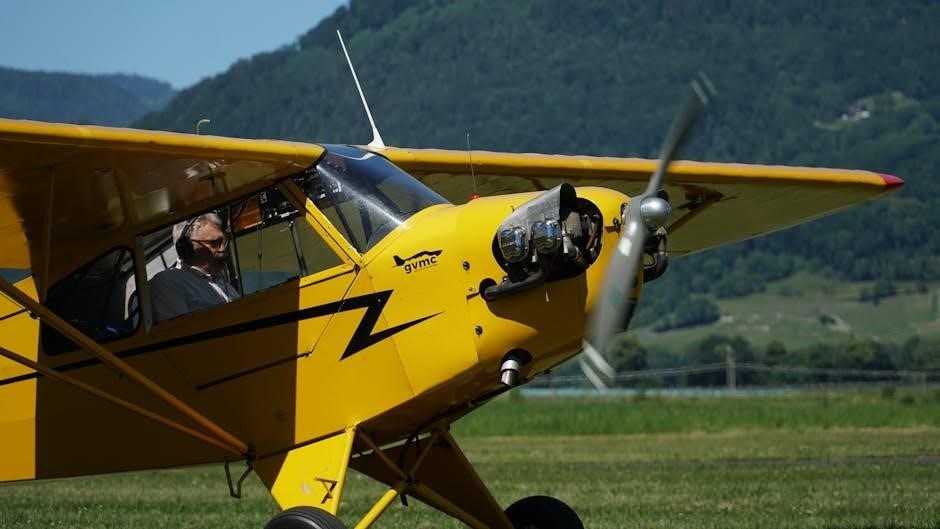
The Lycoming O-360 is a four-cylinder, normally aspirated, air-cooled, horizontally opposed engine renowned for its reliability and widespread use in general aviation aircraft. This engine, and its variants (A Series, B2D, C Series, D Series), powers a diverse range of aircraft, making a thorough understanding of its overhaul crucial for maintenance professionals.
This overhaul manual provides detailed guidance for restoring the O-360 to its original performance specifications. It’s essential to recognize the engine’s components and operational principles before undertaking any disassembly or repair work. Proper overhaul ensures continued safe and efficient flight operations, adhering to stringent aviation standards and Textron Lycoming guidelines.
Familiarity with the engine’s history and common failure points is also beneficial, preparing technicians for potential challenges during the overhaul process.
Understanding the Overhaul Process
The Lycoming O-360 overhaul is a meticulous process involving complete engine disassembly, thorough inspection of all components, and replacement of worn or life-limited parts. This isn’t simply a repair; it’s a restoration to zero-time condition, ensuring optimal performance and reliability.
The process adheres to strict Textron Lycoming standards, utilizing specific tolerances and procedures outlined in the overhaul manual (Part 60298-3). Key stages include cylinder removal, crankshaft evaluation, and accessory gearbox servicing.
Accurate documentation of all work performed is critical, alongside adherence to torque specifications and proper lubrication practices, guaranteeing a safe and compliant engine rebuild.
Tools and Equipment Required
A comprehensive Lycoming O-360 overhaul demands specialized tools and equipment, extending beyond standard mechanics’ sets. Essential items include precision torque wrenches, cylinder bore gauges, and a crankshaft balancing machine.
Valve spring testers, piston ring compressors, and bearing installation tools are also crucial, alongside cleaning equipment for parts washing and solvent tanks. Access to a hot tank for cleaning engine components is highly recommended.
Furthermore, a well-equipped workshop requires lifting equipment, detailed manuals (like 60298-3), and calibrated measuring instruments to ensure accuracy throughout the overhaul process.
Disassembly Procedures
The Lycoming O-360 overhaul begins with meticulous disassembly, following a systematic approach outlined in the overhaul manual. Initial steps involve draining fluids and disconnecting all accessories, including the gearbox.
Cylinder removal requires careful attention to torque sequences and proper tool usage, while the crankshaft disassembly necessitates marking component orientation for correct reassembly.
Detailed documentation of each step is vital, including photographing parts and labeling components to avoid confusion. Proper organization of removed parts is essential for efficient reassembly and inspection.
Cylinder Removal and Inspection
Cylinder removal from the Lycoming O-360 requires adherence to specific torque sequences, as detailed in the overhaul manual, to prevent damage. After removal, a thorough visual inspection is crucial.
Inspect cylinder bores for scoring, cracks, and excessive wear, utilizing precision measuring tools. Valve seats should be examined for pitting and proper alignment.
Pay close attention to the cylinder head fins for any signs of damage or corrosion. Documentation of all findings is essential for determining cylinder serviceability and replacement needs during the overhaul process.
Crankcase Disassembly
Disassembly of the Lycoming O-360 crankcase demands meticulous attention to detail, following the overhaul manual’s prescribed steps to avoid damage to critical components. Begin by carefully removing all accessory housings and mounting brackets.
Subsequently, detach the oil pump and related plumbing, noting the orientation of all parts for correct reassembly. The main bearing caps must be removed in a specific sequence, documented in the manual, to prevent distortion.
Inspect the crankcase halves for cracks, wear, and proper alignment before proceeding with further overhaul procedures.
Accessory Gearbox Removal
The Lycoming O-360 accessory gearbox removal requires careful execution, as it houses vital components for engine operation. Begin by disconnecting all attached accessories – the fuel pump, magneto drive, and vacuum pump – ensuring proper labeling for reinstallation.
Next, detach the gearbox mounting hardware, supporting the gearbox’s weight during removal to prevent damage. Inspect the drive shaft for wear or damage, and carefully examine the gearbox housing for cracks or deformation.
Refer to the overhaul manual for specific torque specifications and procedures to ensure a safe and effective removal process.

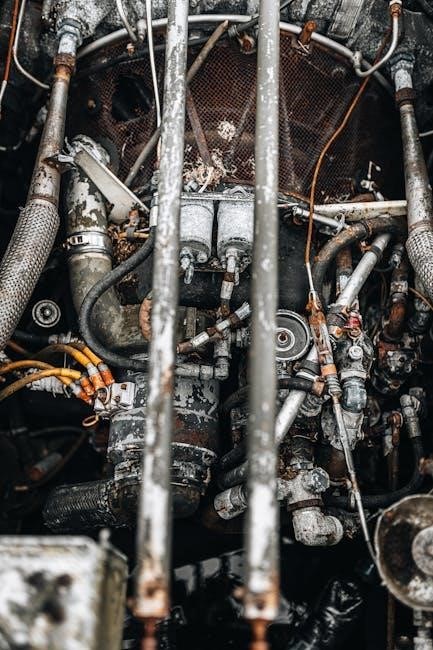
Inspection of Engine Components
Thorough inspection is crucial during a Lycoming O-360 overhaul, ensuring airworthiness and reliability. Each component demands meticulous scrutiny for wear, cracks, and damage. Cylinders require bore gauge measurements and visual checks for scoring or corrosion.
Pistons and rings must be inspected for wear, carbon buildup, and proper fit within the cylinder bore. The crankshaft and connecting rods need evaluation for straightness, bearing surface condition, and any signs of fatigue.
Adherence to Lycoming’s inspection criteria (detailed in the overhaul manual) is paramount for accurate assessment.
Cylinder Inspection Criteria
Cylinder inspection during an O-360 overhaul demands precision. Begin with a visual check for cracks, especially around the valve seats and exhaust ports; Utilize a bore gauge to measure cylinder bore diameter at multiple points, verifying it remains within Lycoming’s specified tolerances.
Inspect for scoring or excessive wear on the cylinder walls, indicating potential piston or ring issues. Check valve guides for looseness and valve faces for pitting or burning. Ensure proper seating of valves when installed.
Any cylinder failing to meet criteria requires replacement.
Piston and Ring Inspection
Thorough piston and ring inspection is crucial during an O-360 overhaul. Examine pistons for cracks, scoring, and excessive carbon buildup. Measure piston diameter at various points to confirm it remains within service limits, avoiding excessive wear.
Inspect piston rings for wear, breakage, and carbon deposits. Check ring end gaps using a feeler gauge, ensuring they fall within Lycoming’s specifications for proper sealing. Replace rings if gaps exceed limits or if significant wear is detected.
Always replace piston rings during overhaul, alongside any pistons exhibiting damage.
Crankshaft and Connecting Rod Evaluation
A meticulous evaluation of the crankshaft and connecting rods is paramount. Inspect the crankshaft journals for scoring, pitting, and any signs of damage. Measure journal diameters to verify they remain within acceptable wear tolerances, utilizing precision instruments.
Check connecting rods for straightness, cracks, and bearing bore wear. Inspect connecting rod bearings for wear patterns and damage, replacing them as a standard overhaul procedure. Ensure proper bolt stretch during reassembly.
Any crankshaft exhibiting damage requires grinding or replacement.
Parts Replacement – A Comprehensive List
A successful Lycoming O-360 overhaul necessitates comprehensive parts replacement. This includes mandatory replacements for all O-360 series (A, B2D, C, D) engines, ensuring reliability. Piston rings, valves, bearings, bolts, seals, and hoses are consistently replaced.
Recommended replacements extend to items like oil pumps and potentially the propeller. Over 100 individual parts are typically addressed during a thorough overhaul. Refer to the detailed parts list for specific quantities and part numbers.
Utilize Textron Lycoming’s guides for accurate component selection.
Mandatory Replacement Parts (O-360-A Series, B2D, C Series, D Series)
All Lycoming O-360 series overhauls (A, B2D, C, and D) require specific mandatory part replacements. These are non-negotiable for maintaining engine integrity and safety. Piston rings are always replaced, alongside all valves to ensure proper sealing. Bearings – both main and connecting rod – are also mandatory replacements.
Critical fasteners like bolts and studs must be new, as well as all seals and gaskets. Hoses are also included in this mandatory list. These replacements guarantee a reliable and safe engine rebuild.
Recommended Replacement Parts
Beyond mandatory replacements, several parts are strongly recommended during an O-360 overhaul for optimal performance and longevity. This includes the fuel pump, often showing wear after extended service. Replacing the oil pump is also advisable, ensuring consistent lubrication. Consider new connecting rod bolts, even if within limits, for added safety.
Upgrading the magneto can improve ignition reliability. Replacing all engine hoses proactively prevents future leaks. New intake and exhaust valves guides are also recommended. These upgrades contribute to a more dependable and efficient engine.
Assembly Procedures
Following meticulous disassembly, precise reassembly is crucial. Begin with crankcase reassembly, paying close attention to bearing clearances and proper torque specifications. Balancing the crankshaft is essential for smooth operation. Cylinder installation requires careful attention to torque values and gasket sealing.
Accessory installation – including the fuel pump, magneto, and carburetor – demands adherence to manufacturer guidelines. Verify proper timing and control cable adjustments. Final inspection confirms all components are securely fastened and functioning correctly before engine testing.
Crankcase Reassembly and Balancing
Crankcase reassembly demands precision, starting with meticulous cleaning and inspection for damage. Install main bearings with correct clearances, utilizing Plastigage for accurate measurement. Apply assembly lube to all bearing surfaces; Torque main bearing caps to specified values in a cross-pattern sequence.
Crankshaft balancing is critical for vibration reduction. Dynamic balancing ensures smooth operation at all RPMs. Check crankshaft runout and correct as needed. Install counterweights if required. Verify proper oil clearances throughout the crankcase assembly before proceeding.
Cylinder Installation and Torque Specifications
Cylinder installation requires careful attention to detail, ensuring proper seating against the cylinder base. Install new gaskets and O-rings to prevent leaks. Lubricate cylinder hold-down bolts before installation. Torque cylinder hold-down bolts in a specific sequence – typically three stages – to achieve uniform compression.
Refer to the Lycoming overhaul manual for precise torque values, varying by engine series (A, B2D, C, D). Incorrect torque can lead to cylinder damage or oil leaks. Verify proper cylinder alignment and compression before proceeding with accessory installation.
Accessory Installation
Accessory installation follows cylinder installation and requires meticulous attention. Install the starter, alternator, vacuum pump, and fuel pump, utilizing new gaskets and seals. Ensure proper alignment of pulleys and belts to prevent premature wear. Torque all accessory mounting bolts to the manufacturer’s specifications, found within the overhaul manual.
Verify correct operation of each accessory after installation. Check for proper belt tension and adjust as needed. Inspect wiring connections for security and correct polarity. Refer to Textron Lycoming’s guides for removal and installation labor allowances.
Engine Testing and Break-In
Post-overhaul engine testing is crucial for verifying proper function. Perform a thorough ground run, checking oil pressure, fuel pressure, and ignition timing. Monitor for leaks and unusual noises. Utilize a dynamometer for precise power output measurements; Follow the procedures outlined in the Lycoming overhaul manual (Part 60298-3).
Break-in requires specific oil – a break-in oil formulated for new or recently overhauled engines. Operate at reduced power settings for the initial 50 hours, gradually increasing to full power. Regularly check oil levels and inspect for any anomalies during this critical period.
Post-Overhaul Engine Testing Procedures
Initial testing begins with a thorough ground run, verifying oil pressure, fuel pressure, and ignition timing accuracy. Carefully monitor for any leaks around seals, gaskets, and fittings. Listen intently for unusual noises that could indicate internal issues. A dynamometer is recommended for precise power output and performance evaluation.
Follow the detailed procedures outlined in the Lycoming O-360 overhaul manual (Part 60298-3). Record all readings and observations. Ensure proper magneto timing and mixture control. Gradually increase RPM while observing all parameters, confirming stable operation before flight.
Break-In Oil and Operational Guidelines
Utilize a break-in oil specifically formulated for newly overhauled engines, typically a mineral-based oil with added zinc and detergents. Avoid synthetic oils initially, as they can reduce seating of new piston rings. Operate at reduced power settings – no more than 65% power – for the first 50 hours.
Monitor oil consumption closely during this period. Avoid prolonged high-RPM operation and aggressive maneuvers. Regular oil analysis is crucial to detect any abnormal wear. Follow the Lycoming O-360 overhaul manual’s recommendations for oil change intervals and operational limits during break-in.
Lycoming O-360 Series Specific Considerations
Different O-360 series (A, B2D, C, D) necessitate varied overhaul approaches. The A series may require more extensive case inspection due to age. B2D models often feature improved oiling, impacting wear patterns. C series engines introduced roller tappets, demanding specific valve train checks.
D series engines may have different accessory mounting configurations. Always consult the specific overhaul manual for your engine’s series. Pay close attention to mandatory replacement parts listed for each series. Understand the unique characteristics of each variant to ensure a thorough and accurate overhaul.
IO-360-N1A Engine Overhaul Differences
The IO-360-N1A overhaul diverges from the standard O-360 due to its fuel injection system. This necessitates specialized training and tools for injector servicing and testing. Electrical connector inspection is critical, given the engine’s advanced ignition system. Pay close attention to the magneto timing procedure, which differs significantly.
The IO-360-N1A manual (dated 02-2016) provides detailed guidance on these unique aspects. Ensure proper grounding of all components to prevent electrical issues. Carefully review the fuel system diagrams before disassembly.

Warranty Information and Textron Lycoming Guides
Textron Lycoming provides a Removal and Installation Labor Allowance Guidebook to assist with cost estimations during overhaul. Parts that are repaired or replaced during the overhaul process are typically warranted for the remainder of the original warranty period. This coverage ensures quality and reliability of the rebuilt engine.
Always consult the official Textron Lycoming documentation for the most up-to-date warranty details and specific terms. Proper documentation of all work performed is crucial for warranty claims. Adherence to Lycoming’s overhaul procedures is also essential.
Relevant Manuals and Publications (Part 60298-3)
The core resource is the 114-page illustrated Overhaul Manual (Part 60298-3), available in PDF download format for Lycoming O-360 and O-540 series engines. Additional manuals cover specific models like the O-290-D2 and the IO-360-N1A, offering detailed repair and overhaul procedures.
Operators Manuals from Lycoming provide essential operational guidance. These publications detail critical information for safe and effective engine maintenance. Accessing these resources ensures technicians have the necessary knowledge for a successful overhaul, adhering to manufacturer specifications.
Safety Precautions During Overhaul
Prioritize safety throughout the Lycoming O-360 overhaul process. Always disconnect the battery to prevent electrical hazards. Wear appropriate personal protective equipment (PPE), including eye protection and gloves, when handling chemicals and engine components.
Be mindful of potential hazards associated with fuel, oil, and cleaning solvents – ensure adequate ventilation. Properly support heavy engine parts during disassembly and assembly to avoid injury. Consult the IO-360-N1A overhaul manual for specific hazard warnings and safe practices.